
monday.com Implementation Consultant
5 minutes
Make.com integrations | No code app integrations | Make.com scenarios
monday.com Make integration | make.com scenario examples | monday.com webhook
Project Managers | IT teams | monday.com users want to make custom integrations
Using monday.com, but native features ain’t cutting it?
In this article we’ll show you how we integrate changes between monday.com boards using Make.com. This is perfect if you’re looking for a simple monday.com Make integration tutorial or Make.com scenario examples!
Say you have templated project boards for each of your projects with a pre-determined list of tasks. These project boards are connected to a portfolio board.
But now, you want the value of a specific task under the project board (for example, the item Task 2 “Date” under Project A) to reflect on the Portfolio Board as Project Board A “Task 2 Date.” This feature is not natively available on monday.com, so let’s create a monday.com Make integration to achieve this!
Here are the steps:
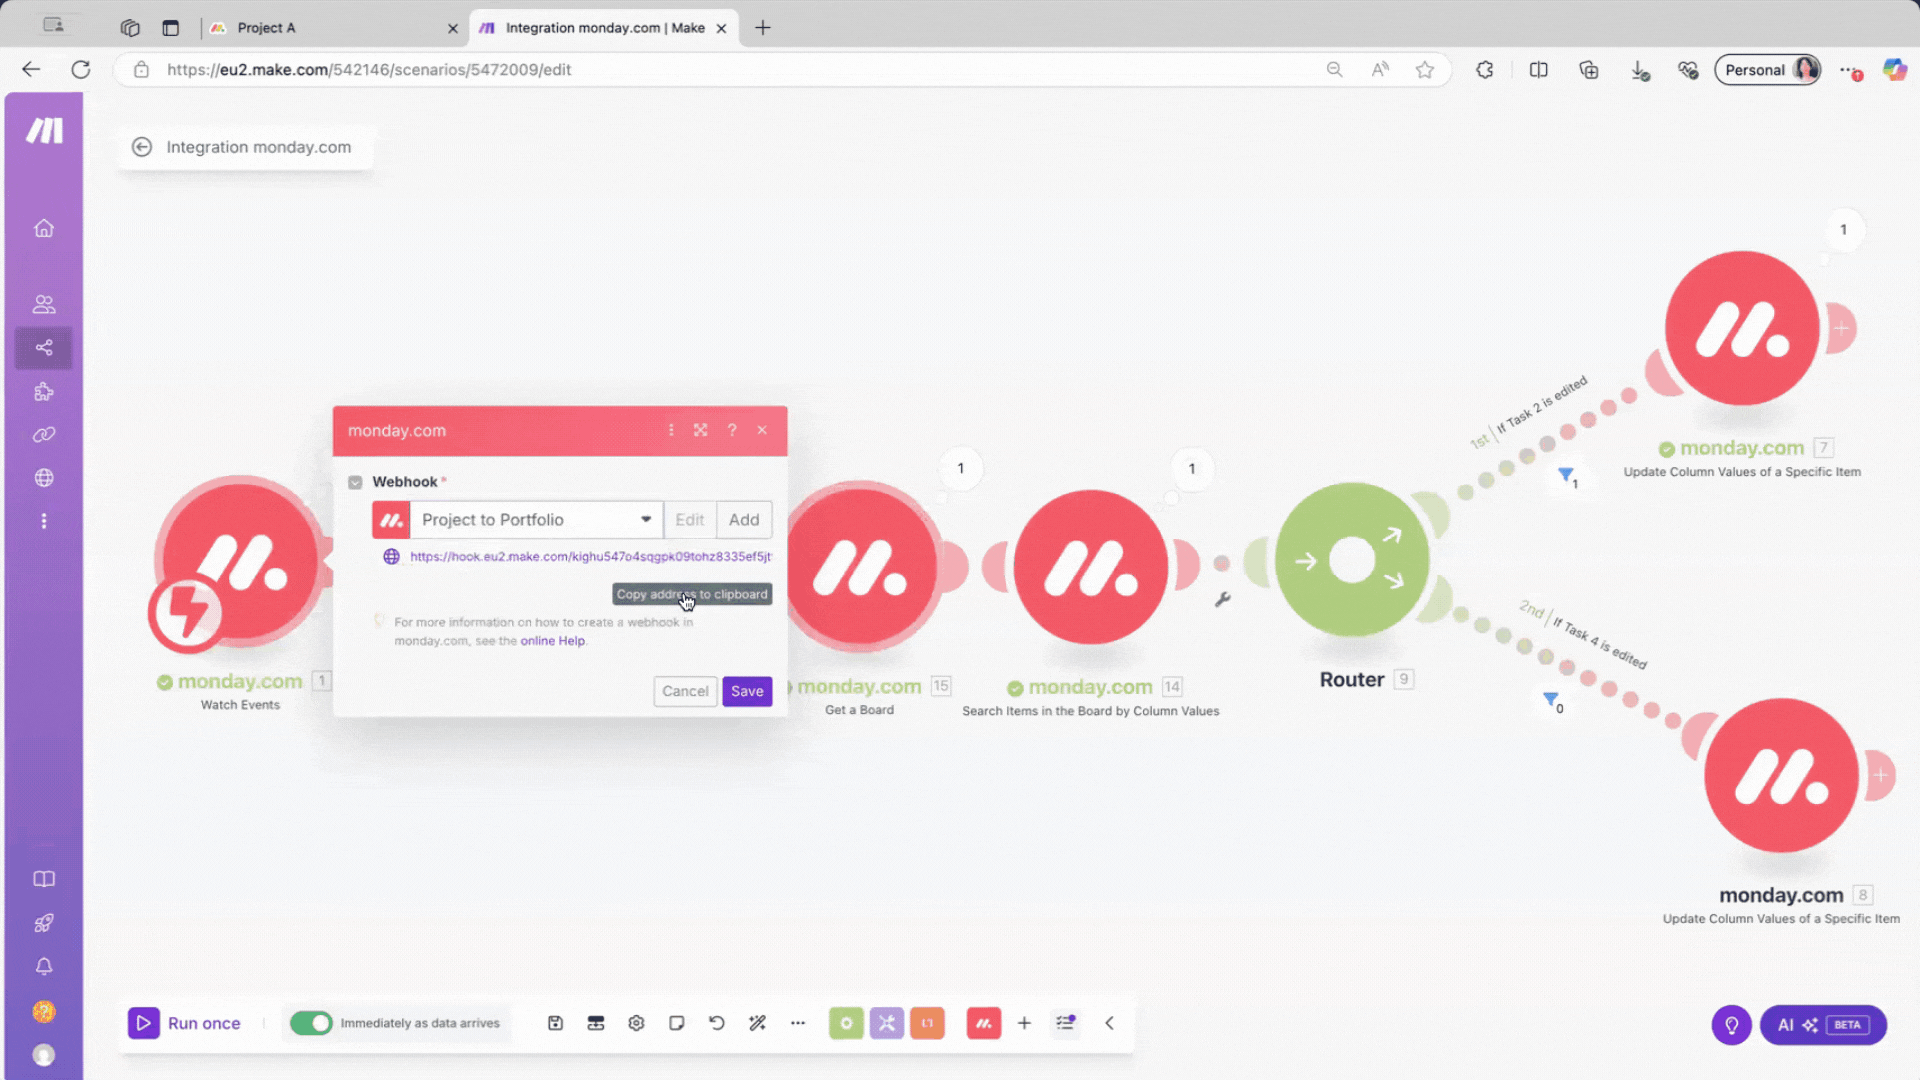
For each Project Board, Go to Automate > Custom Automation and search for Webhooks. Use the recipe: When a column changes, send a webhook. This monday.com webhook automation will prompt you to input a specific webhook URL.
Where to get that specific webhook URL: In Make.com, select the monday.com Watch Events module and copy the URL provided therein to the monday automation mentioned above. This is the first module in your Make.com scenario.
What this does: Every time you change the date in your project board for any item, it will send that data (in this case, the date), to the Make scenario. This monday.com webhook is the trigger of your scenario, and a key step if you want to automate monday.com boards reliably.
Get an Item Module. The next module fetches the item details from the project board where the webhook was sent (in this case, when the item date was changed). The output comes from the first module, Watch Events.
Get an Item Module. The next module fetches the item details from the project board where the webhook was sent (in this case, when the item date was changed). The output comes from the first module, Watch Events.
Note: Add a filter between the Get an Item module and the Watch Events module to limit which items pass through the scenario (e.g., we only want Task 2 or Task 4). We use “OR” conditions so that either of the said items can pass through.
Get Board Module. This retrieves the board’s ID to know which board the update happened in. It also gets data from the Watch Events module.
Search Items in Board by Column Values Module. This finds, in the Portfolio Board, the item or project that matches the Project Board Name retrieved in the Get Board Module. This setup is essential for a working monday.com portfolio board setup.
Agile boards in monday dev consist of the following core boards: tasks, sprints, epics, bugs queue, and restrospective. Each team has their own set of these boards.
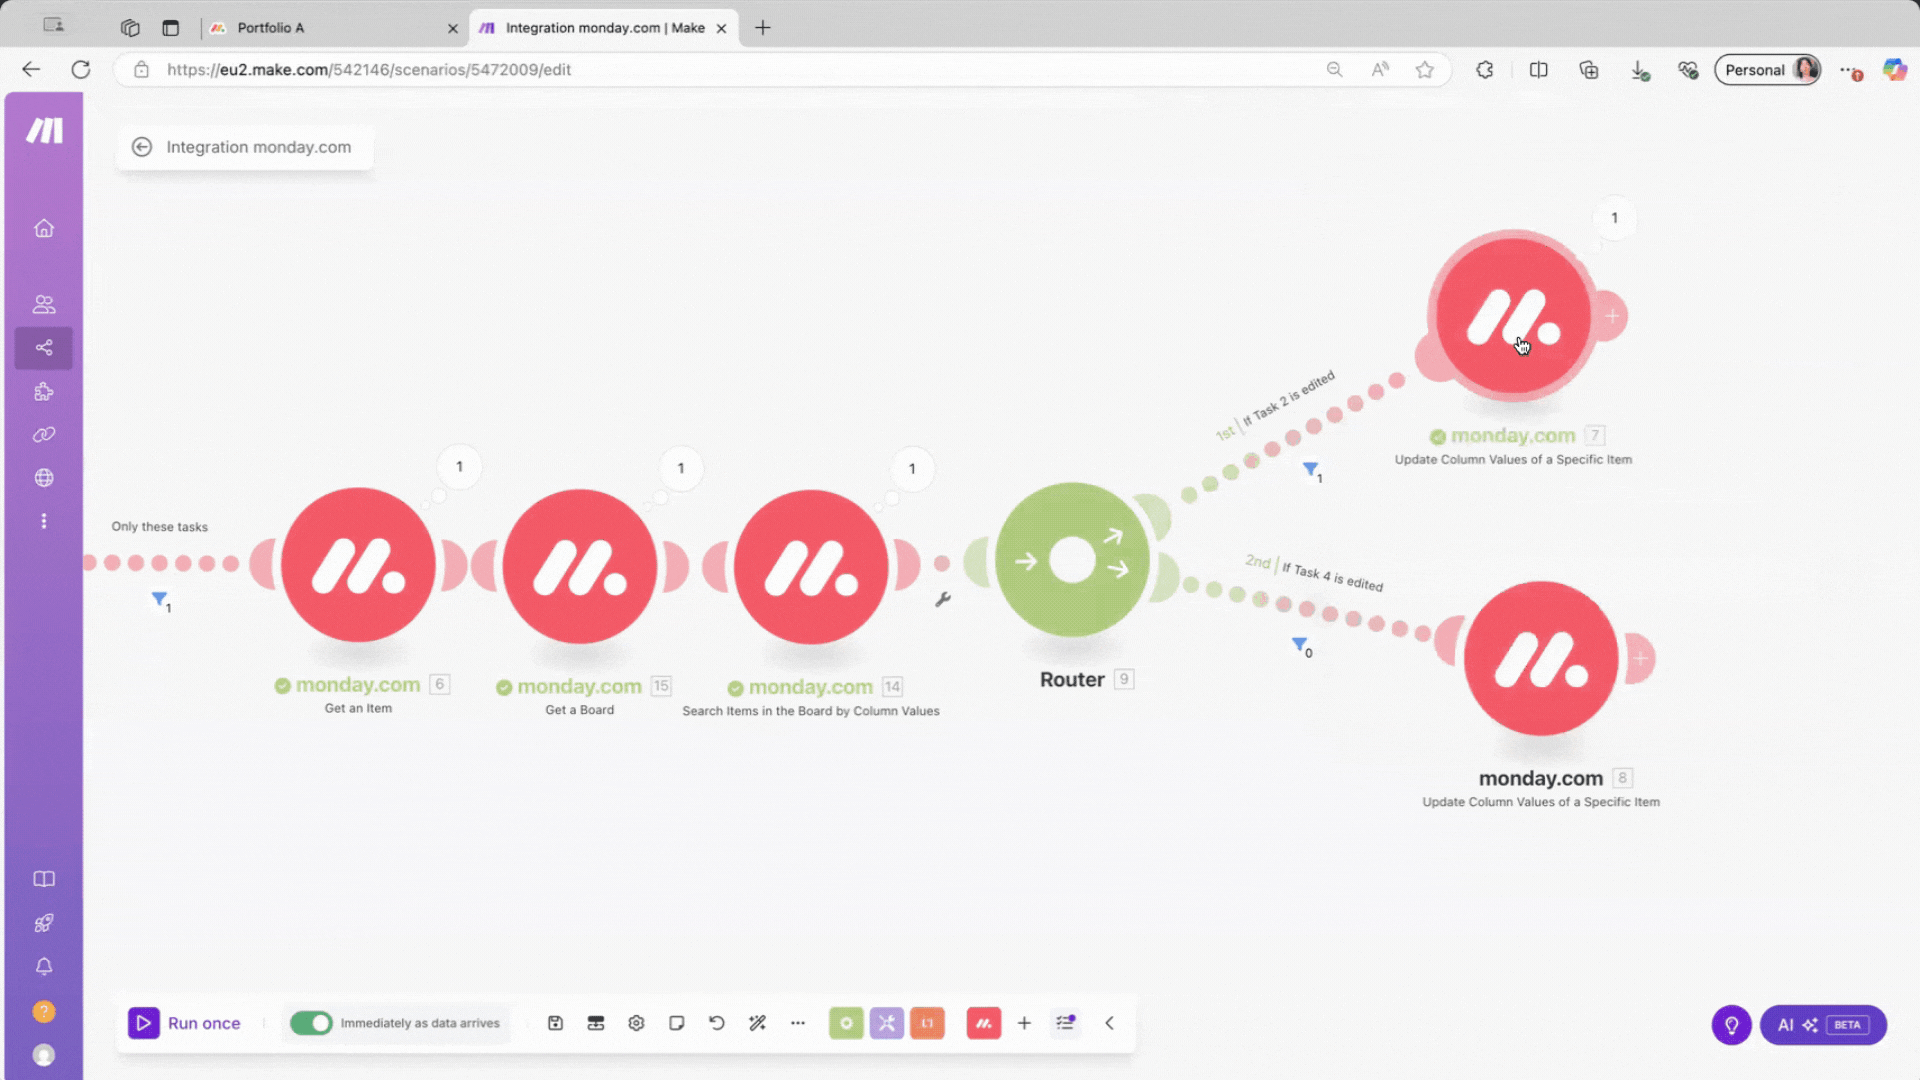
The module we will use is Update Column Values of a Specific Item. The specific item we want to update is the Project Item in the Portfolio Board, so we will use the output Item ID from the Search Items in Board by Column Values Module.
In this module, look for the column you want to update (e.g., Task 2 Date) using the changed date from the original project board.
Repeat this for every task column you want to sync by cloning the update module and setting a filter for each task (e.g., Task 2, Task 4, etc.).
And that’s how you create a monday.com Make integration! Make sure to save your Make.com scenario as you set this up to make sure any configurations are not lost.
📅Want to set up an integration like this? Book in for a free 30-minute consultation, on us!
Collect all tasks across different monday.com boards on one master board providing complete visibility and control over your data.
✓ No credit card required ✓ Get a free 14-day trial
Mint Consulting Australia Pty Ltd (ABN: 13 629 524 572) is a Sydney-based CRM and Salesforce Managed Services consultancy specializing in implementations, integrations, and business strategy, supported by a skilled local team of consultants, solution architects, and developers.
Get a FREE 14-day monday.com trial